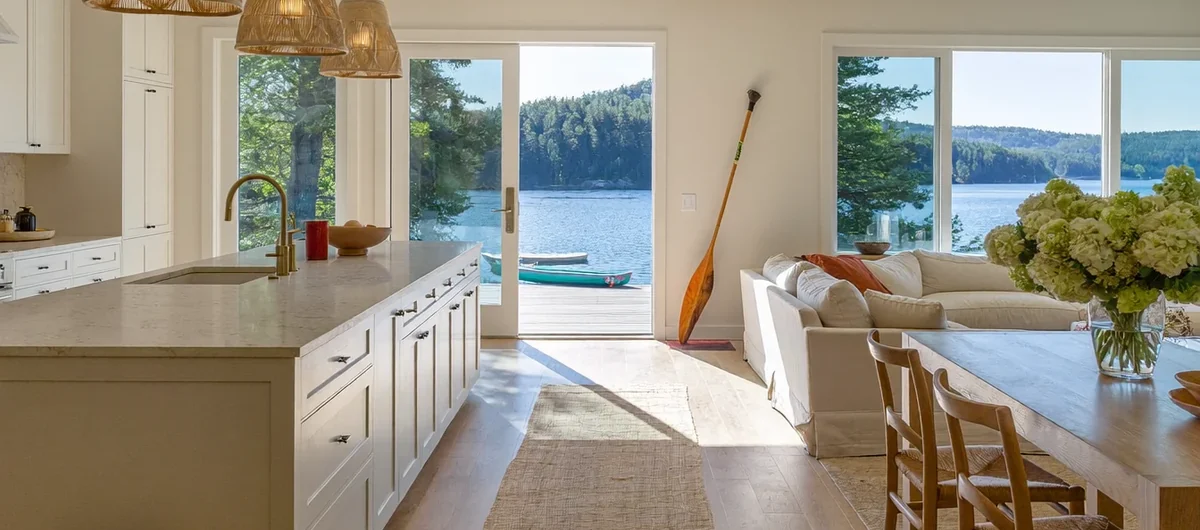
I used to think knocking down walls was the whole trick. Big open room, done. Then I actually lived in one. The sofa floated in the middle like it had wandered in by mistake, the dining table felt like an afterthought, and every dirty pan was on display from the couch.
Here’s what fixed it: zones. When the kitchen, dining and living areas each have a clear job, a clear edge and their own light, one big space suddenly feels calm, connected and very easy to live in. 🏡
Below are 20 open concept kitchen, dining and living room ideas, all about layout, flow and zoning. Rugs, ceilings, furniture backs, lighting, sightlines and a few clever dividers. Pick the ones that fit your room and your family, and steal freely.
Anchor the Living Zone With an Oversized Rug
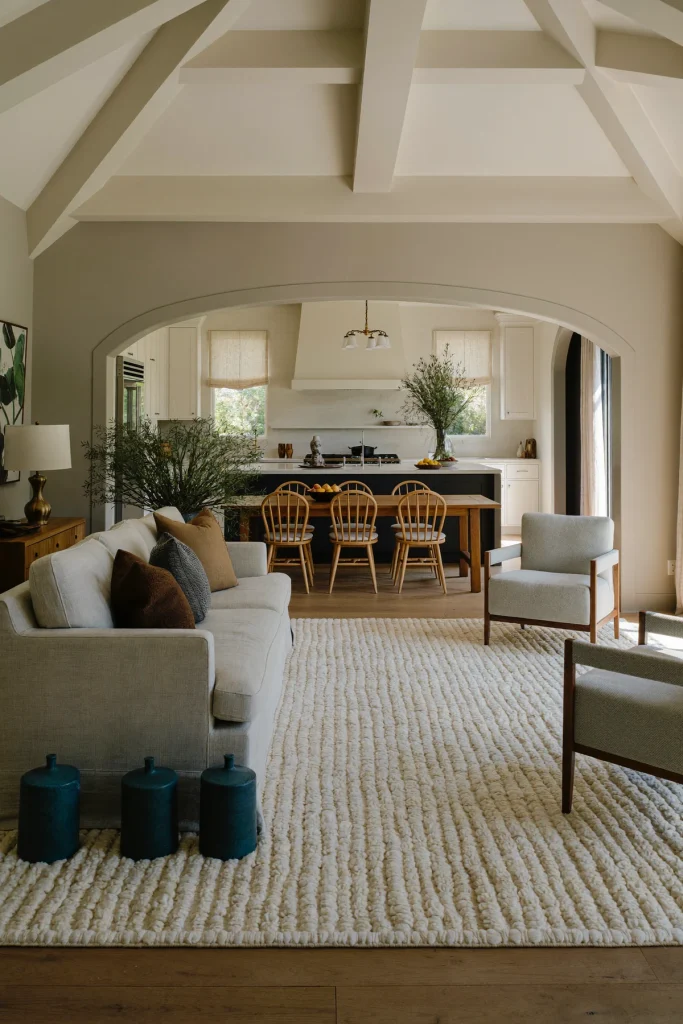
The fastest way to tell your eye “this is the living room” is a rug big enough to hold the whole seating group. Small rugs float. Big rugs claim territory.
Go for at least 8×10 feet in most family rooms, and let the front legs of the sofa and chairs sit on it. A wool or wool-blend rug in a soft, low pattern works hard and hides crumbs that drift over from the kitchen.
Once the rug is down, the sofa, chairs and coffee table suddenly look like a group instead of strangers. It also softens the echo that big open rooms tend to have.
Rule of Thumb
Leave 12 to 18 inches of bare floor between the rug’s edge and the nearest wall or walkway. That gap is what makes the zone read as deliberate.
Float the Sofa With Its Back to the Kitchen
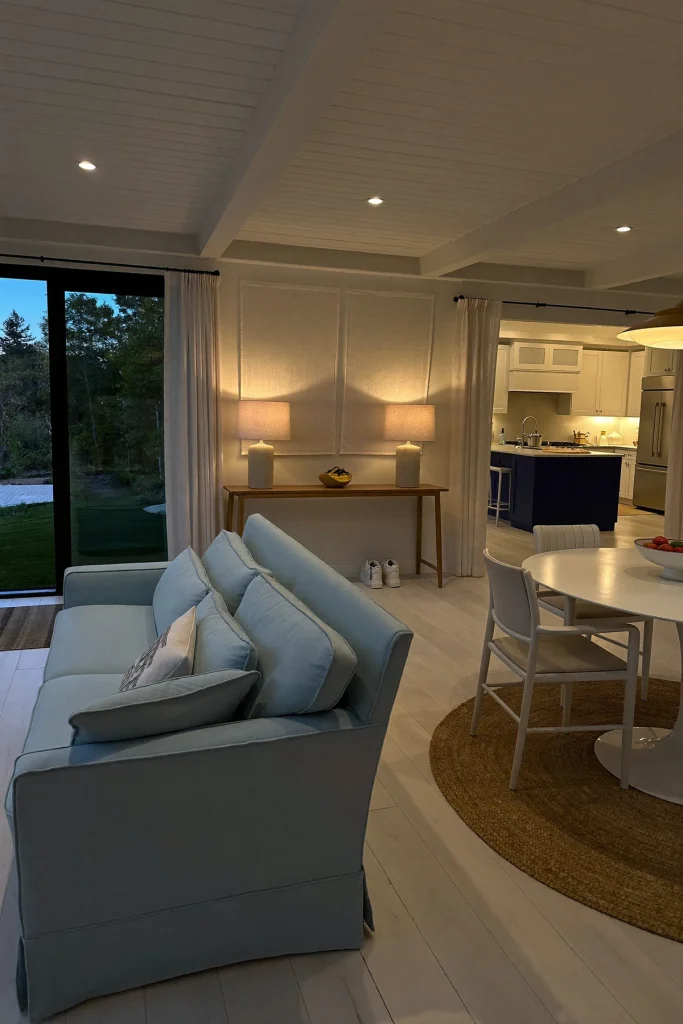
Pushing the sofa against a wall in an open plan usually leaves an awkward no-man’s-land in the middle. Pull it out instead and turn its back toward the kitchen. That single sofa back becomes a soft wall.
Add a slim console table behind it for lamps, a bowl for keys and maybe a basket or two underneath. Now the back of the sofa looks finished, and the living zone has a clear border. Your family will naturally walk around it, which keeps traffic out of the conversation area. 🛋️
Hang a Statement Chandelier Over the Dining Table
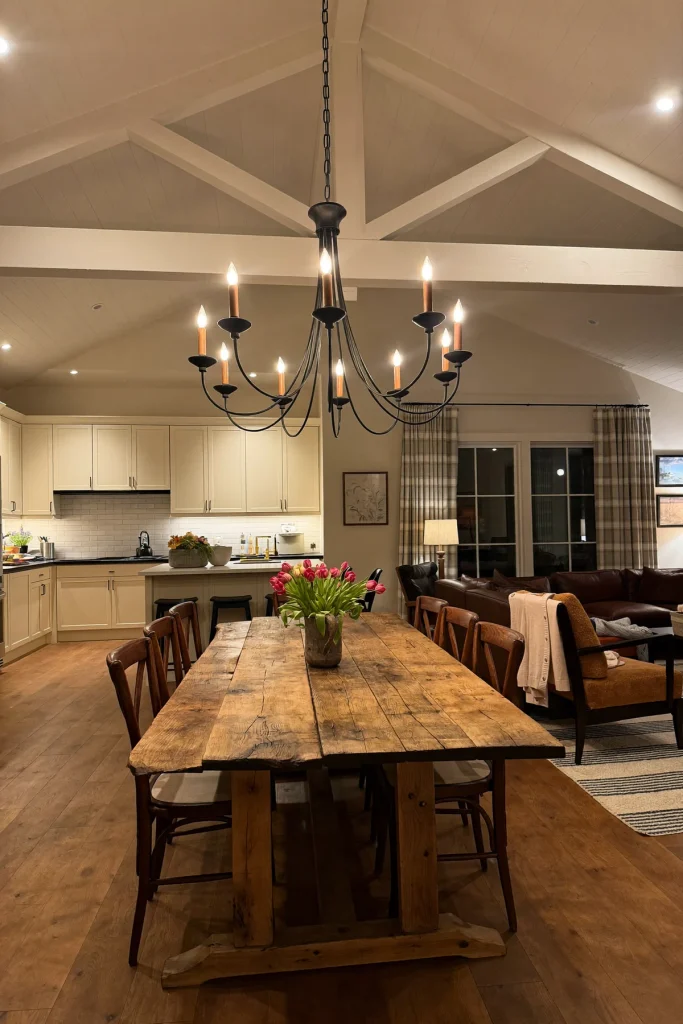
In an open room, the dining table can feel like it’s just parked there. A chandelier fixes that by drawing an invisible ceiling over it.
Choose something with real presence, like a wood bead, iron or woven fixture, roughly half to two-thirds the width of your table. Center it on the table, not on the room. That’s the key. Once the light lines up with the table, the dining zone has its own little room, no walls needed.
If your island already has pendants, pick a chandelier in a related material rather than a matching one, so the two zones feel like cousins, not twins.
Pro Tip
Hang the bottom of the fixture about 30 to 36 inches above the tabletop. Any higher and it reads as part of the ceiling, not part of the dining zone.
Line Up the Island, Table and Sofa on One Axis
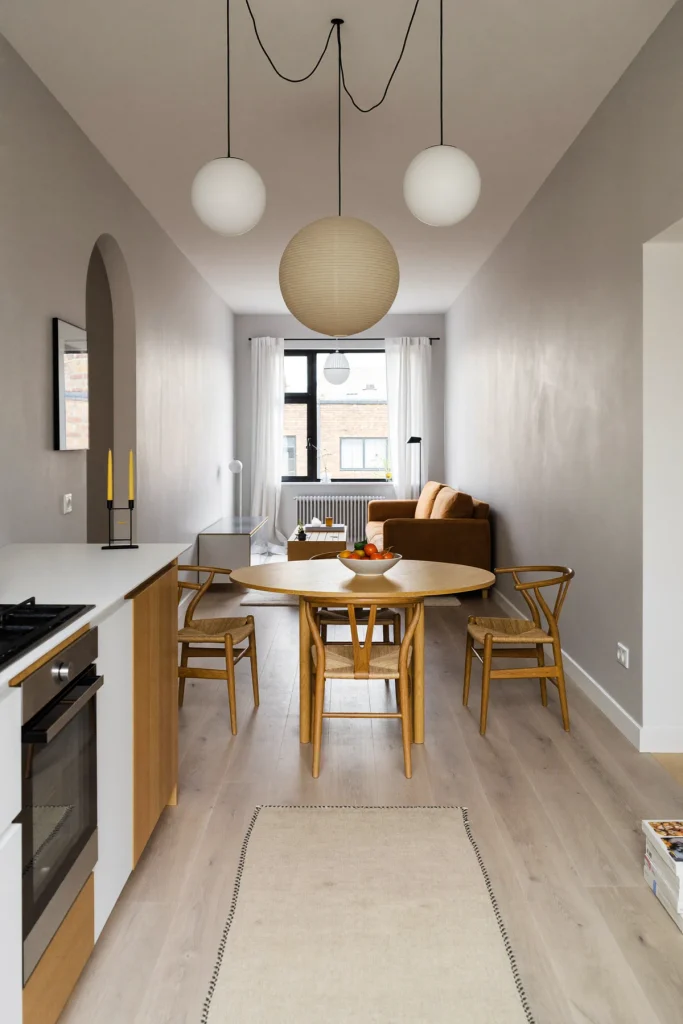
This one sounds fussy, but it’s the secret behind so many calm open plans. Center the island, the dining table and the sofa on the same invisible line running through the room.
When the three big pieces line up, your eye glides from one zone to the next instead of bouncing around. It also makes pendant lights, rugs and windows easier to place, because everything shares a center point.
Grab painter’s tape and mark the line on the floor before you move a thing. Five minutes of planning saves a lot of furniture shoving. ✨
Run a Peninsula Between the Kitchen and Dining Zone
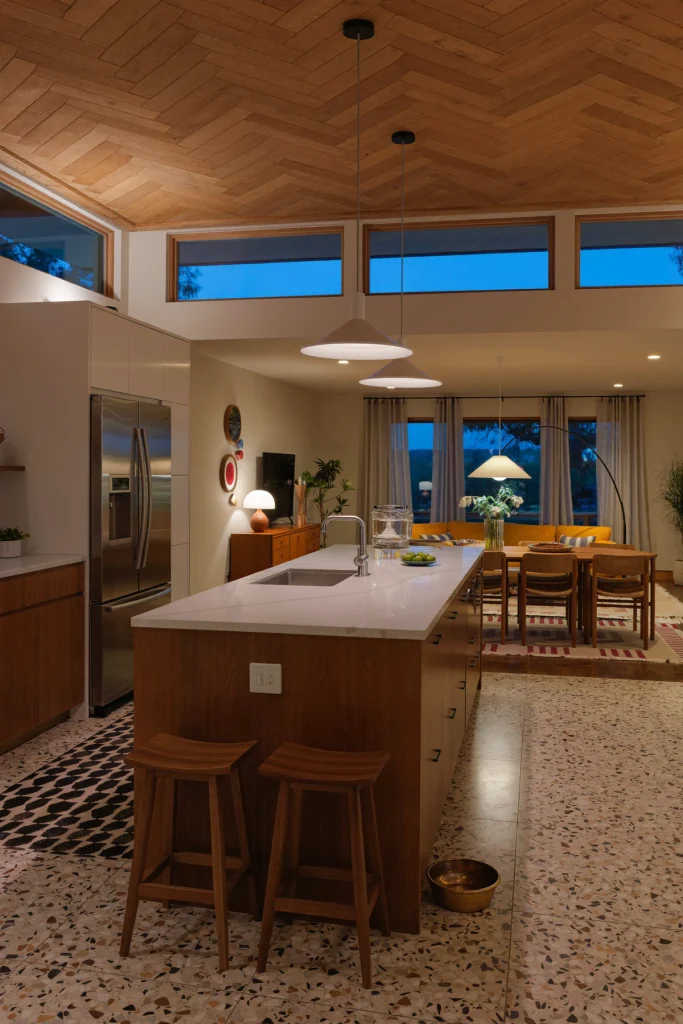
If you don’t have room for a full island, a peninsula does a brilliant zoning job. It attaches to your cabinets on one end and stops short of the dining area, giving you a clear “kitchen ends here” line.
Keep the dining side open with a counter overhang for two or three stools. The cook stays part of the conversation, but cutting boards and dish piles stay on the working side.
It works especially well in L-shaped kitchens and long great rooms, where a full island would squeeze the walkway. Finish the end of the peninsula with a decorative panel so it looks like furniture from the dining side.
Build a Banquette Into the Back of the Island
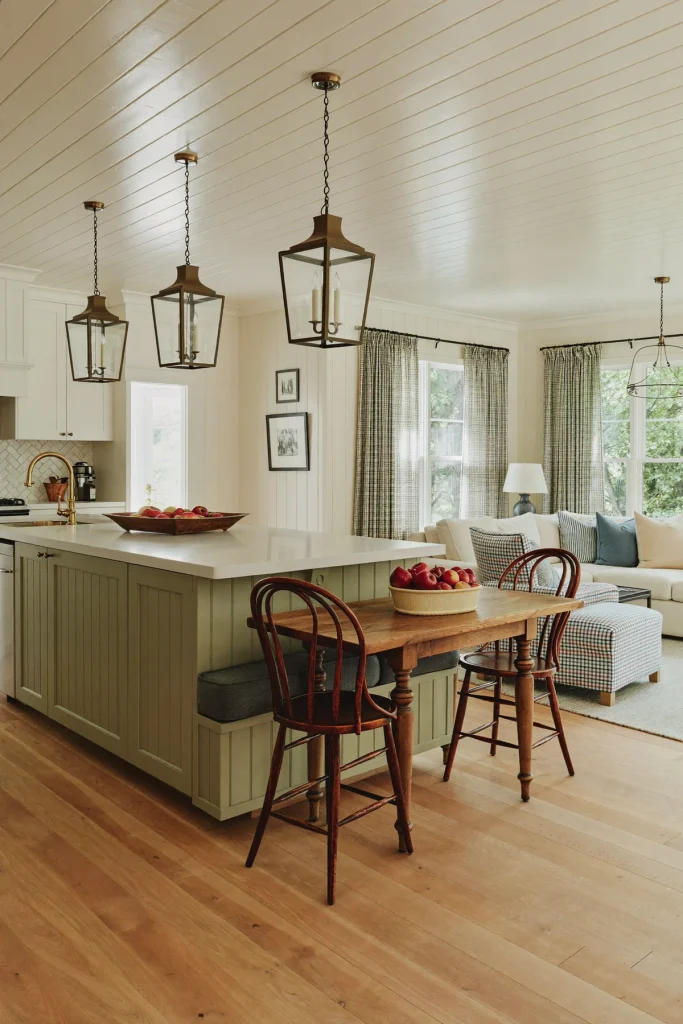
Here’s a space saver I adore. Instead of a freestanding dining table with chairs all around, build a cushioned bench right into the back of your island and pull a table up to it.
You save a full row of chair clearance, and the island now does double duty as kitchen workspace on one side and dining seat on the other. It also makes the shift from cooking to eating feel natural. Add a few washable cushions and a pair of chairs on the open side, and it’s ready for homework, crafts and Sunday pancakes.
Mark the Living Area With Ceiling Beams
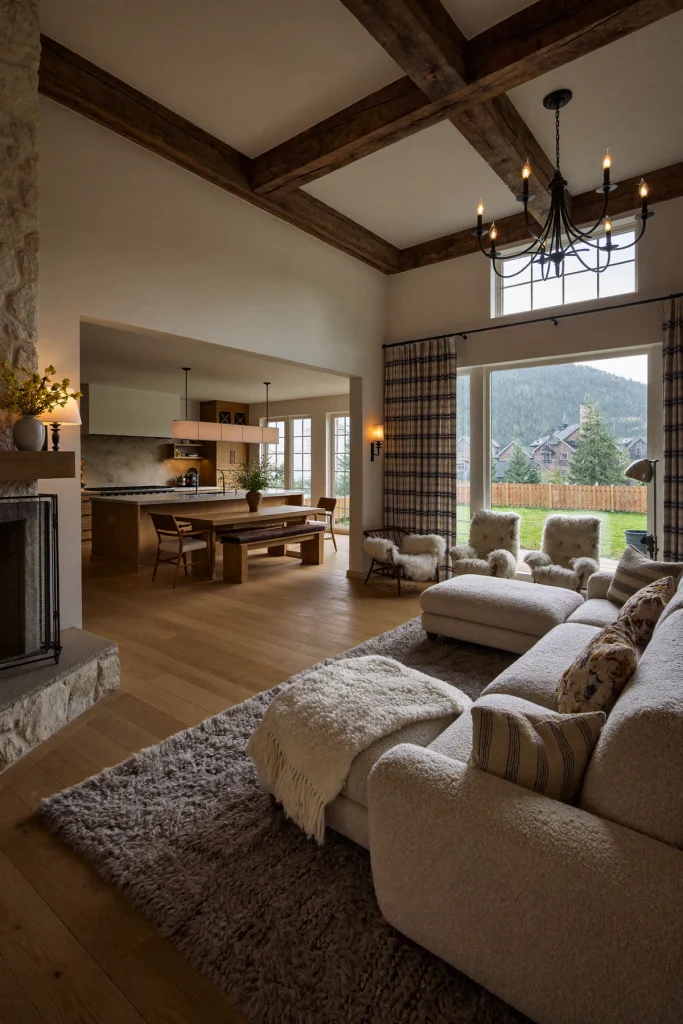
Look up. Your ceiling can zone a room just as well as a rug can. Adding wood beams over the living area only, and leaving the kitchen ceiling smooth, creates a cozy canopy where everyone gathers.
Faux beams made from lightweight wood boxes are a realistic DIY project for most handy homeowners. Stain them to echo your floor or dining table so the zones still feel related.
The result is a living area that feels lower, warmer and more sheltered, which is exactly what you want when the TV’s on and the rain is coming down outside. 🌧️
Carry One Color Through All Three Zones
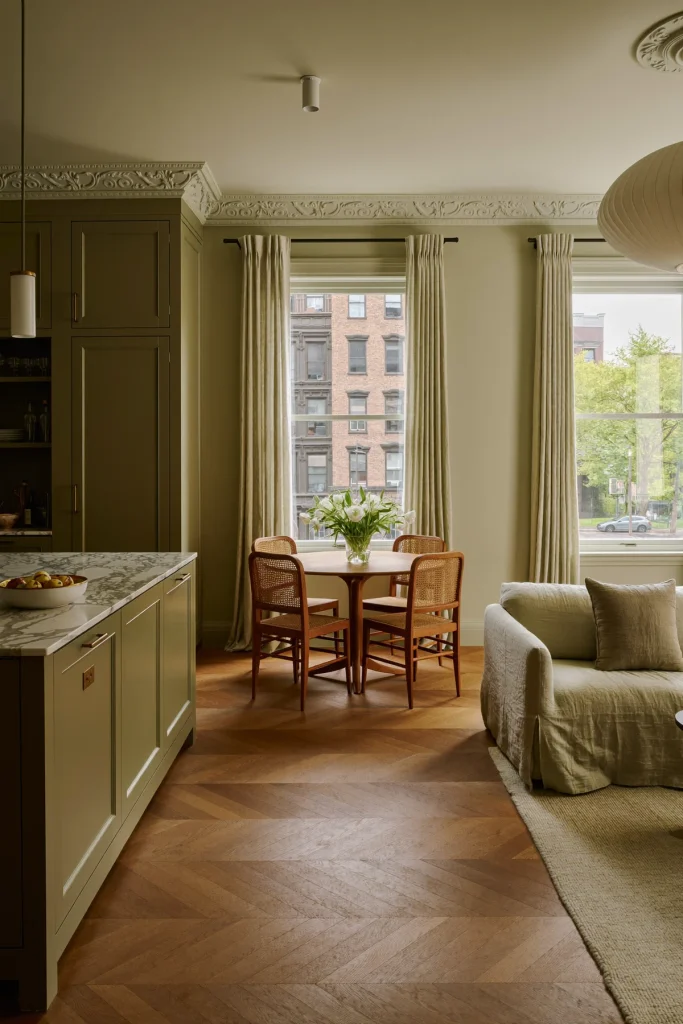
When every zone gets its own paint color, an open room can look chopped up. Choose one main wall color and let it flow, then change the depth of it instead.
Try a soft sage on the walls, a deeper sage on the kitchen island, and a pale sage linen on the sofa. Same family, different volumes. It feels zoned and calm at once.
Carry the same color onto the trim and ceiling, slightly lightened, and the room reads as one calm shell. The furniture and rugs can then do all the zoning, without the walls fighting them.
Color Swap
| If your main color is… | Use this deeper shade on the island or built-ins |
|---|---|
| Warm white | Mushroom or greige |
| Pale sage | Olive or eucalyptus |
| Soft blue-gray | Slate or deep denim |
| Oat or sand | Clay or caramel |
Choose a Round Dining Table to Ease Traffic
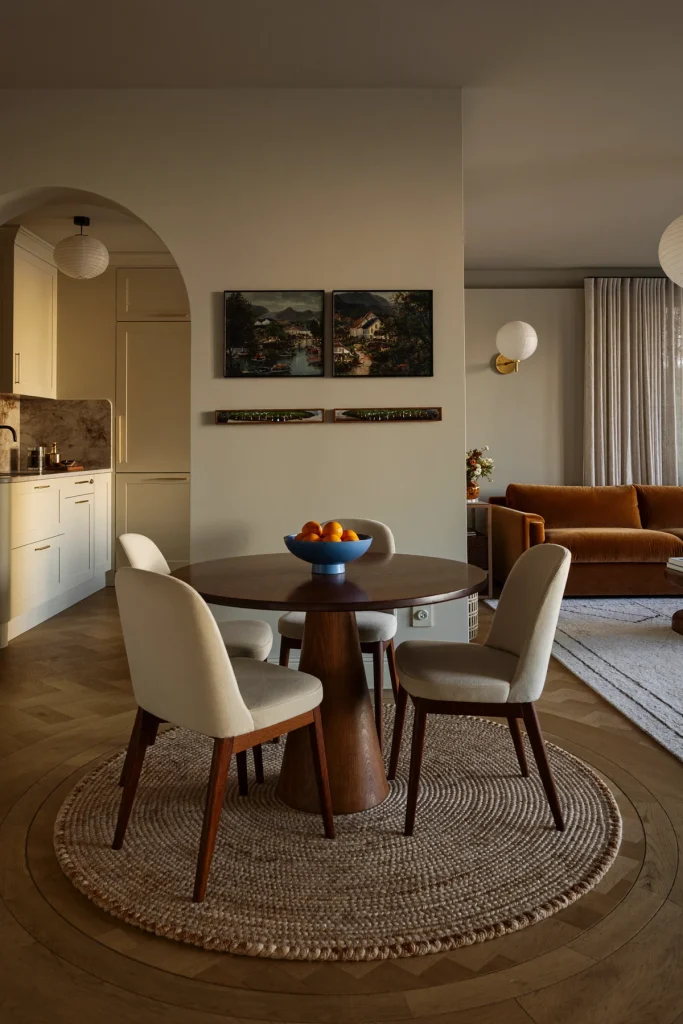
Square corners catch hips. In an open plan where people cut past the table all day, a round or oval table is so much kinder.
It lets traffic flow around the dining zone instead of bumping into it, and it fits neatly between the kitchen and living areas without stretching the room. A pedestal base is even better, since there are no corner legs to trip over.
Bonus: round tables make conversation easier. Everyone can see everyone, which matters when half the family is in the kitchen and half is on the sofa.
Keep a Clear Walkway Through the Middle
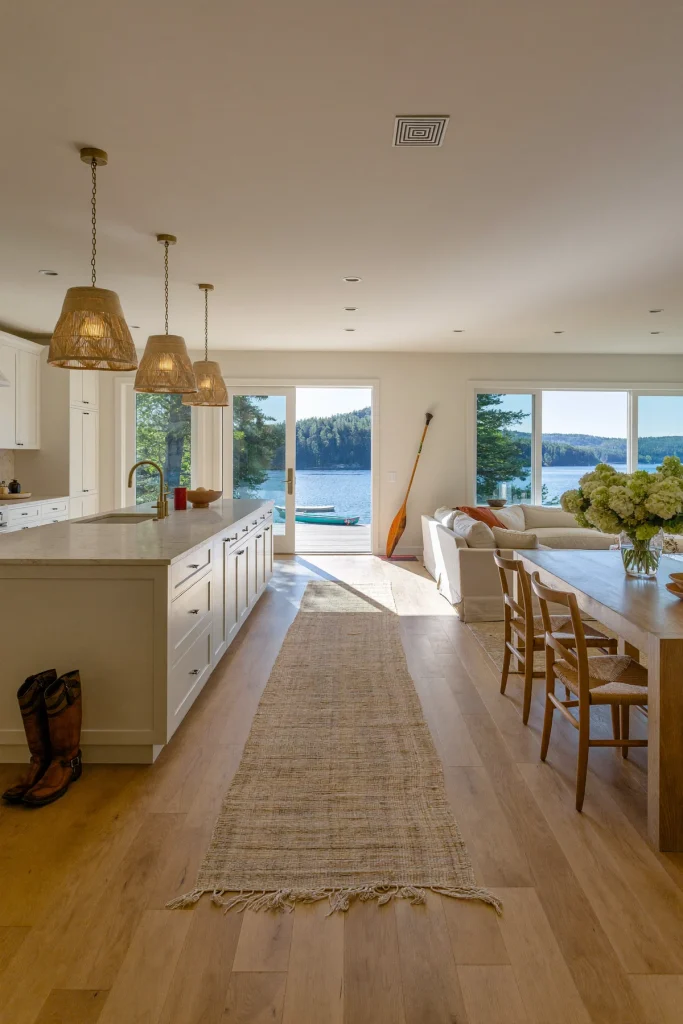
The best open plans have a main path, like a hallway with no walls. Decide where people actually walk, usually from the entry to the kitchen and out to the back door, and keep that line completely clear.
Nothing should cross it. No ottoman, no plant stand, no stray dining chair. The zones sit on either side of the path, and the path quietly connects them.
This is the idea that makes every other idea work. Even a beautiful room feels stressful if you’re weaving around furniture to reach the fridge.
Measure It First
- Main walkways: 36 to 42 inches wide
- Behind dining chairs: about 36 inches so people can pass
- Between island and counter: 42 to 48 inches
- Sofa to coffee table: around 16 to 18 inches
Layer Three Rugs That Share One Color
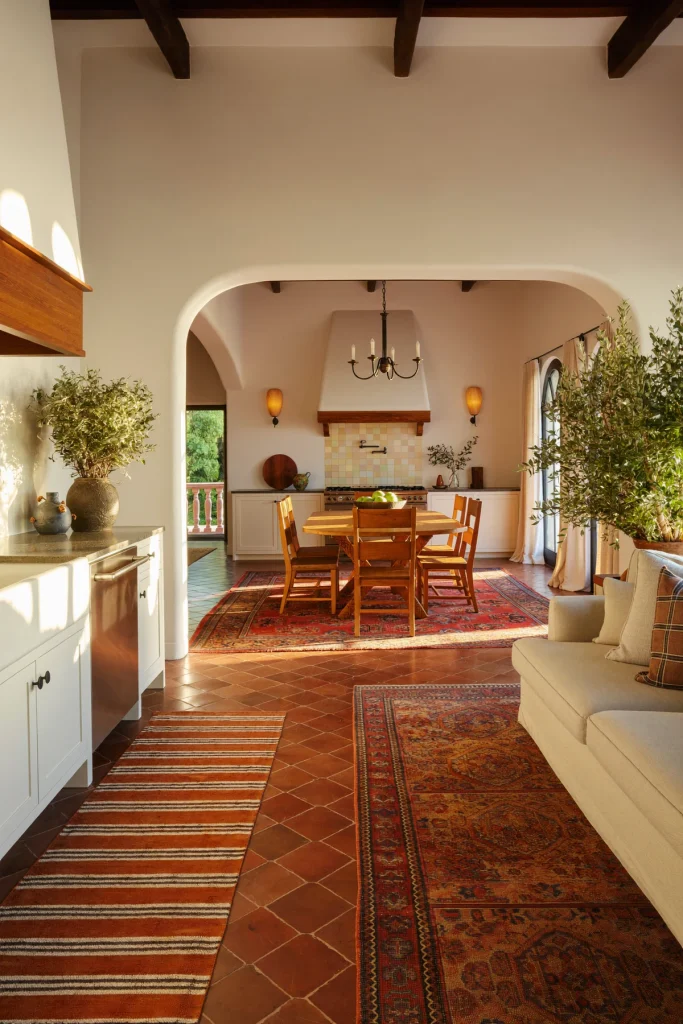
Every zone deserves its own rug, but three rugs in three totally different looks can feel chaotic. The fix: pick one color and make sure it shows up in every rug.
Maybe that’s a rust. A flatweave runner by the kitchen sink with rust stripes. A vintage-style dining rug with rust in the border. A big living room rug with a soft rust in the pattern. Each rug feels different, but together they tell one story.
Keep the rug shapes and sizes matched to their furniture, not to each other. The runner hugs the kitchen, the dining rug clears every chair leg, and the living rug holds the seating group. 🧡
Do This 👉 / Not This ❌
- 👉 Mix a stripe, a medallion and a soft abstract that share one shade
- ❌ Use three bold rugs with no common color
- 👉 Keep the busiest pattern in the zone with the least furniture
- ❌ Put all three rugs touching each other edge to edge
Turn the Living Area Toward the Fireplace
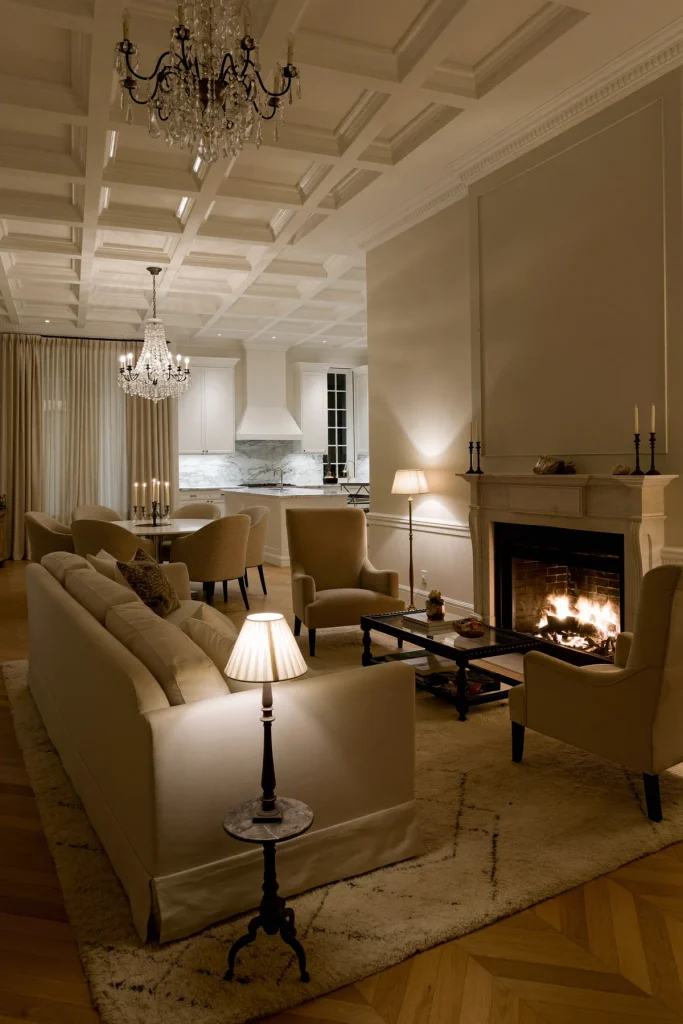
If your open room has a fireplace, let it be the boss of the living zone. Turn the sofa and chairs to face it, and suddenly the living area has a clear front, a center and a back.
This works especially well when the fireplace sits on a far wall, away from the kitchen. The seating group faces out into its own cozy world, while the kitchen and dining stay behind it.
On winter evenings, the firelight warms the whole room, and the table and island glow softly in the background. It’s the kind of layout that pulls everyone together after dinner without anyone planning it. 🔥 Add a pair of armchairs angled toward the hearth to close the circle.
Sink the Living Area Down a Step
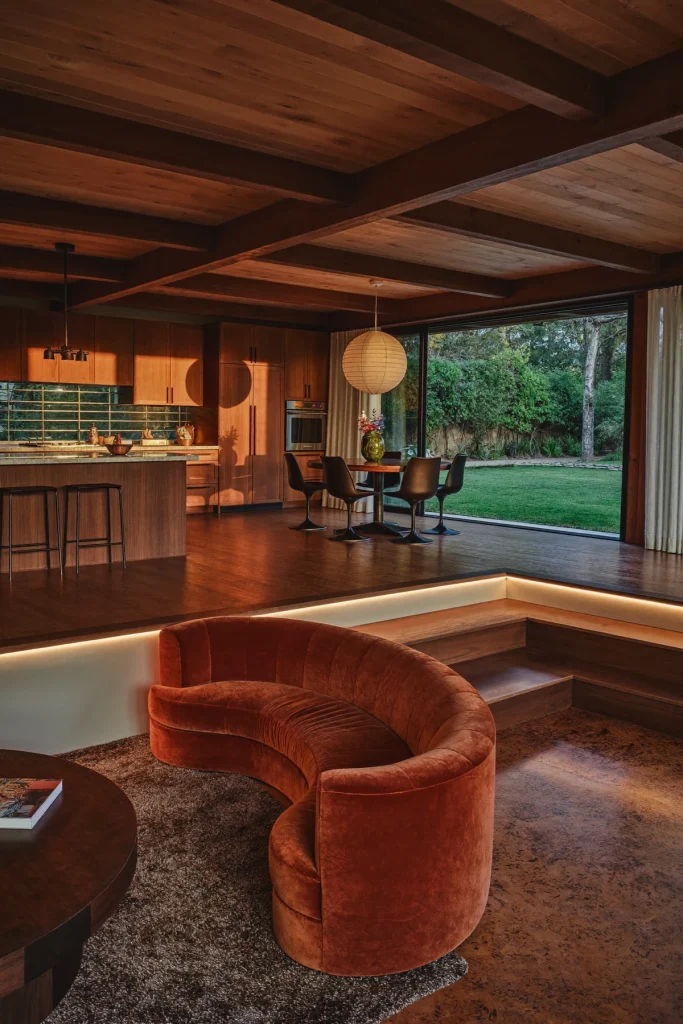
A sunken living area is a retro idea that’s having a real comeback, and for good reason. Dropping the floor even one or two steps gives the living zone its own edge, its own mood and a cozy, tucked-in feel.
You’ll need a contractor for this one, and it’s easiest in new builds or homes on a slab with room to dig. If that’s not on the table, a raised kitchen platform can create the same change in level.
Line the step with a contrasting wood or tile nosing so nobody misses it, and keep the furniture low so the sightlines stay open across the room.
Kid- and Pet-Proof It
Add a low LED strip under the step’s lip, round off any sharp corners, and pick a rug that stops a foot short of the edge so no one slips at the drop.
Frame the Kitchen With a Steel-and-Glass Partition
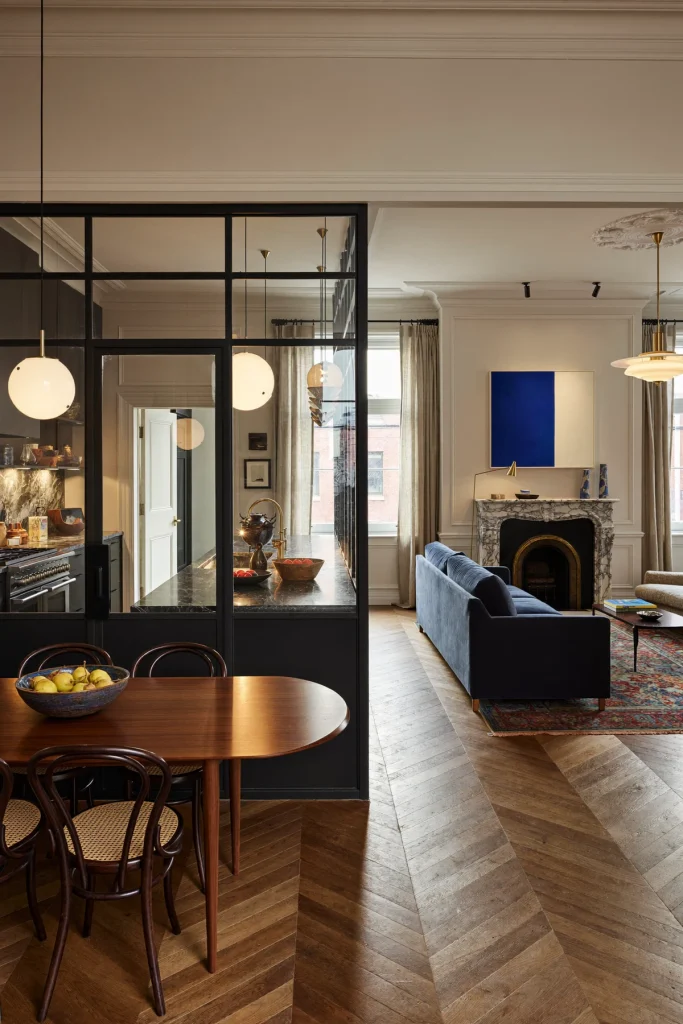
Love the open feeling but hate the cooking smells and the noise of the dishwasher? A steel-framed glass partition is the happy middle ground.
Run it along one side of the kitchen, either floor to ceiling or on top of a low cabinet run. You still see the dining table and living area through the glass, and light moves freely, but the kitchen becomes its own room when you want it to be.
Black steel frames look crisp in older homes and lofts, while bronze or white frames soften the look. Add a sliding or pivot door in the same frame, and you can close the kitchen off when guests arrive and the counter is a mess.
Disguise the Kitchen With a Paneled Cabinet Wall
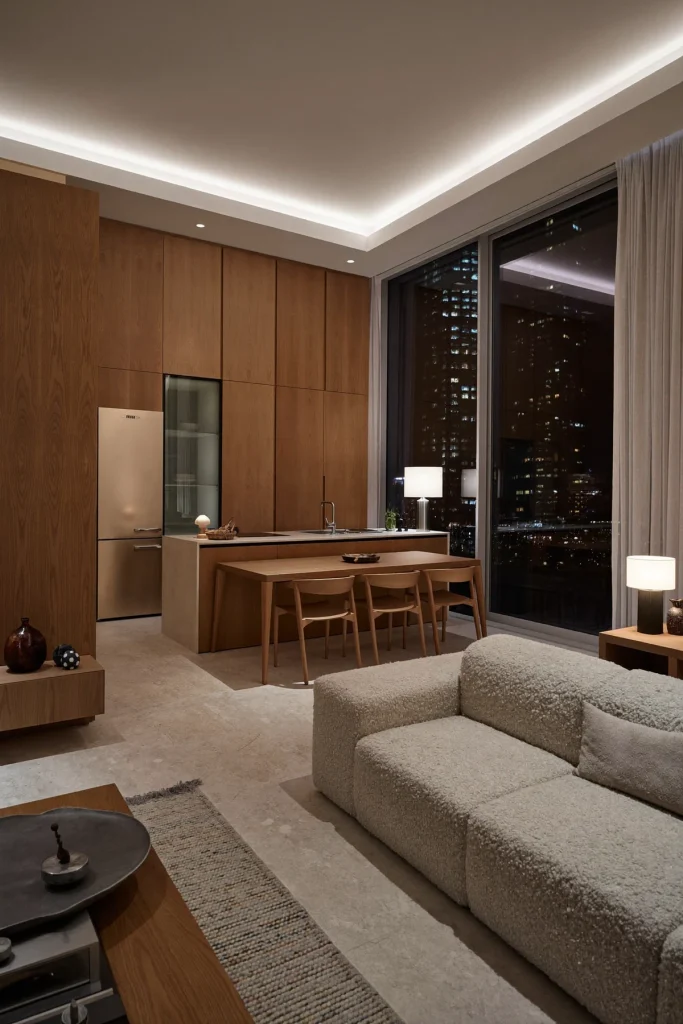
When your kitchen sits in full view of the sofa, the less it looks like a kitchen, the calmer the room feels. A wall of floor-to-ceiling paneled cabinets hides the fridge, pantry, dishwasher and even the coffee maker behind matching doors.
From the living room, it reads more like beautiful millwork than appliances, especially at night when the lamps are on and the kitchen lights are dimmed. The island and a simple range become the only “kitchen” pieces you notice.
Pick a wood tone or soft paint that matches your living room built-ins, and the zones melt together.
What Most People Get Wrong
They panel the fridge and then leave the microwave, the toaster and a row of small appliances out on the counter. Give those a cabinet with a lift-up or pocket door, or the illusion is gone.
Tie the Zones Together With One Metal Finish
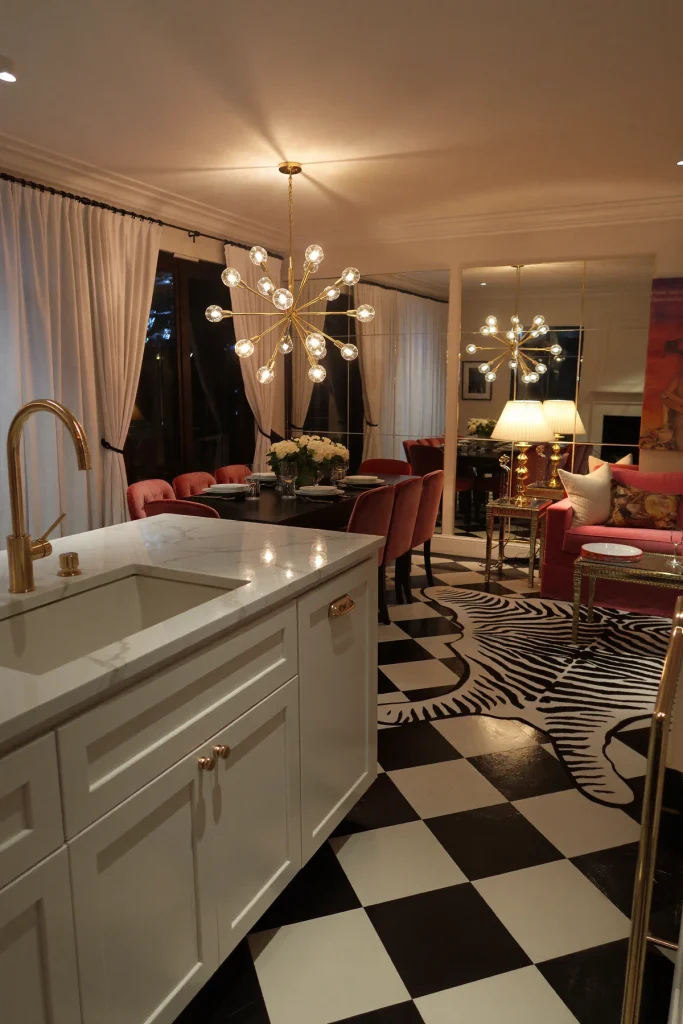
Metal finishes are tiny details, but in an open room you see all of them at once. Choose one hero metal and repeat it in every zone so the space reads as one.
For a glamorous Hollywood Regency take, think brass everywhere: brass cabinet pulls and faucet in the kitchen, a brass chandelier over the dining table, brass lamp bases and a brass-trimmed coffee table in the living area. Pair it with lacquered white, soft pink and black, and the whole room shimmers at night.
You can add one supporting metal, like black iron, as long as the hero metal clearly wins. 🌟
Brass also warms up in lamplight, which helps a big open room feel cozy after dark. Unlacquered brass will patina over time, and honestly, that lived-in glow is half the charm.
Myth-Buster
“You can’t mix metals.” You can. You just need a clear leader. Aim for about 70 percent of one finish and 30 percent of a second, and keep the second one in small doses, like hinges, frames or a single lamp.
Wallpaper the Dining Zone Only
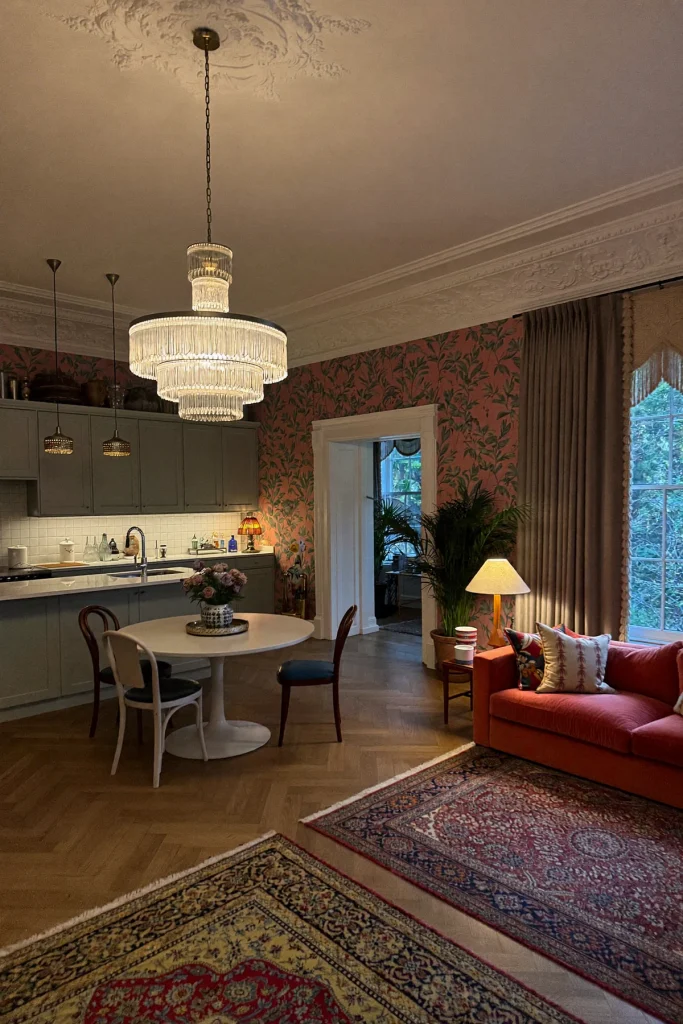
Want the dining area to feel like its own room? Wallpaper it. Just the walls around the table, nowhere else.
In a maximalist home, that might mean a lush botanical paper in deep green and coral wrapping the dining corner, while the kitchen stays in a calm painted color and the living zone picks up one shade from the paper in its pillows and rug.
Stop the wallpaper at a natural break, like an outside corner, a window edge or a column. That clean edge is what makes it look planned. Then repeat one color from the pattern somewhere in the kitchen so the zones still talk to each other.
Prefer something gentler? A small-scale stripe or a soft grasscloth gives the same “this is the dining room” signal without the drama. Peel-and-stick versions are great for trying the idea before you commit. 🌿
Pick Low-Backed Furniture to Keep Sightlines Open
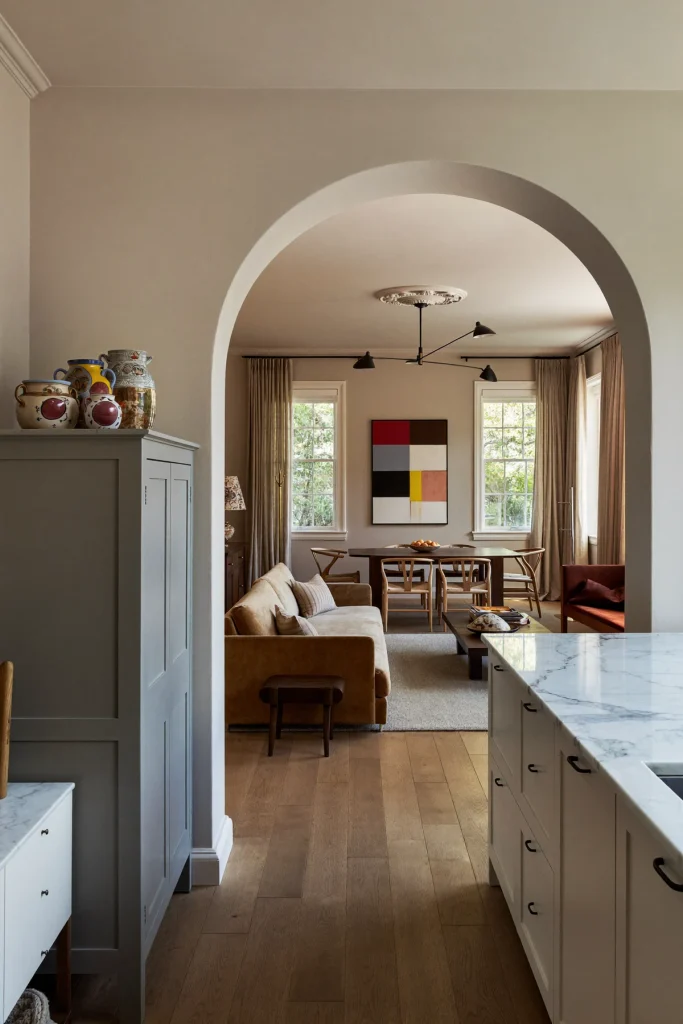
In an open plan, tall furniture is the enemy of a calm room. High-backed sofas, tall wingback chairs and chunky cabinets in the middle of the space block the view and make the whole room feel smaller.
Choose sofas, chairs and dining chairs with backs that sit below the countertop height, and keep tall pieces like bookcases and armoires against the walls. You’ll be able to see from the kitchen sink all the way to the windows on the other side.
This is exactly what makes a big room feel connected. You can see the kids on the floor, the dog in its bed and the light coming in, all from wherever you’re standing. In a busy family home, that view is worth more than any statement chair. Save the tall, dramatic pieces for the walls, where they frame the zones instead of blocking them.
The Sightline Test
Stand at your sink and look across the room. Then sit at the dining table and look again. If anything in the middle of the space blocks your view of a window, move it to a wall or swap it for something lower.
Run One Concrete Wall the Full Length of the Room
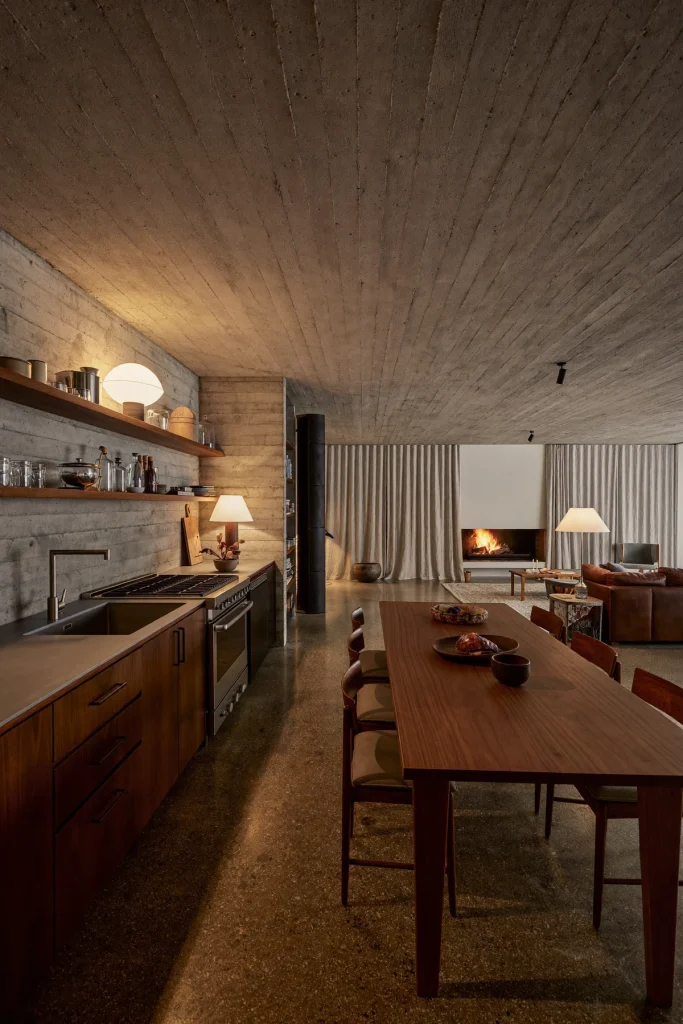
Here’s a bold one for anyone who loves a dramatic, modern look. Let one feature wall run the entire length of your open space, connecting all three zones with a single material.
In a brutalist-inspired home, that’s a long board-formed concrete wall. It holds the kitchen’s open shelves and range at one end, frames the dining table in the middle, and backs a built-in fireplace in the living area. One wall, three jobs.
Concrete can feel cold, so balance it with warm layers: walnut cabinets, a wool rug, a leather sofa, linen curtains and plenty of warm lamplight. Not ready for real concrete? Limewash, microcement or a plaster finish gives the same textured, continuous look for far less weight and cost.
The trick is continuity. Keep the material identical from end to end, and let the furniture create the zones in front of it. It’s a striking way to make a long open space look planned rather than leftover.
Make the Space Work for Your Family
An open concept kitchen, dining and living room is really three rooms sharing one roof. The goal isn’t to fill the space. It’s to give each part a job, a clear edge and a reason to linger, then connect them so they feel like one home.
Start with the big moves: a clear walkway, a rug that anchors the living area and a light that marks the table. Then layer in the details that tie it all together, like one color, one metal and matching curtains.
Try one idea this weekend, live with it for a week, and see how your family uses the room. You’ll know quickly what’s working. 💛
