As an Amazon, ShareASale and Impact Associate, we earn from qualifying purchases. This means that if you click on a link in our blog and purchase an item from Amazon or any of the ShareASale & Impact partners, we receive an affiliate commission at no extra cost to you. This helps us keep our content free and continue to provide valuable information. Thank you for your support! Read our full disclosure here
If you’ve ever gazed longingly at a vintage, farmhouse-inspired piece of furniture, wishing you could recreate the look in your own home, you’re in the right place. This step-by-step guide is here to help you unlock the secrets of painting furniture for a delightful farmhouse look. So, gather your brushes, pick out your paint, and let’s embark on this DIY journey together. Whether you’re a seasoned upcycler or a painting newbie, this guide will have you embracing the magic of farmhouse charm in no time.
So, ready to roll up your sleeves? Let’s dive in!
Key Elements of Farmhouse Furniture Design
To understand how to create the perfect farmhouse painted look, let’s first dive into the key elements that make farmhouse furniture unique:
Natural Wood and Rustic Finishes
When you think of farmhouse design, raw, natural wood surfaces often come to mind. They lend an air of authenticity and rustic charm to your pieces. On my last visit to a quaint little thrift shop, I stumbled upon a pine table that screamed potential. The knots, grains, and rough textures added character and depth, perfect for a farmhouse makeover.
Functional and Comfortable
Farmhouse style emphasizes function just as much as form. The furniture pieces are not just meant to be looked at—they’re to be used, loved, and lived in. They’re comfortable and practical, making your home a space where everyone would love to gather.
Vintage Accents and Distressed Paint
Touches of vintage charm and distressing are key to achieving that perfect farmhouse aesthetic. It’s all about creating an atmosphere of timeless comfort, and what better way to do that than with a beautifully worn paint finish?
Prepping Your Furniture for the Farmhouse Makeover
Once you’ve gained a good grasp of the farmhouse style, it’s time to roll up your sleeves and dive into the makeover process.
Choosing the Perfect Piece to Paint
Before we dive into the nuts and bolts of the painting process, the first step is to choose the perfect piece of furniture. Look for solid, sturdy pieces with good bones, preferably made from real wood. And remember, imperfections add character—so don’t shy away from those thrift store finds with a scratch or two.
The Must-Have Tools and Materials for a Farmhouse Painted Look
Equipping yourself with the right tools is crucial for achieving a stunning farmhouse finish. Here’s what you’ll need:
- Paint Brushes and Rollers: A good quality brush makes all the difference in your painting project. Consider brushes with natural bristles for oil-based paints and synthetic brushes for water-based paints. Rollers can come in handy for larger surfaces.
- Sandpaper and Primer: Your key to a smooth, even paint job. Depending on the condition of your furniture, you’ll need various grits of sandpaper. Primer helps your paint adhere better and last longer.
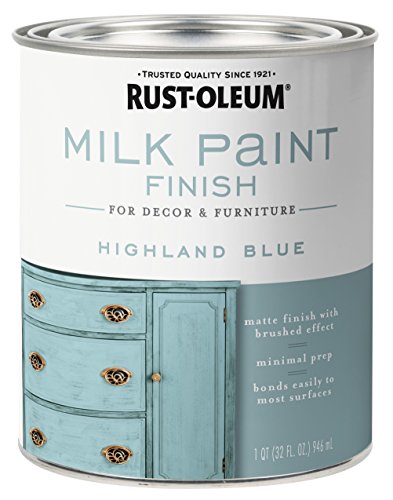
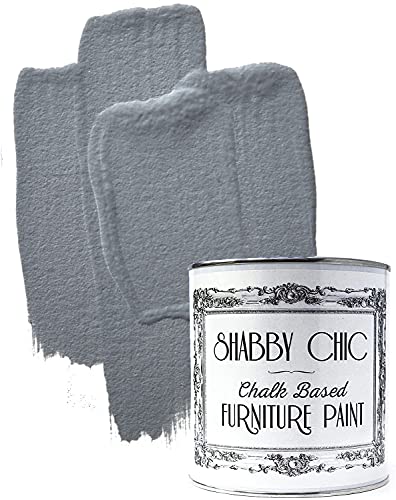
- Farmhouse Style Paint Colors: Creamy whites, cool grays, earthy browns, and pastel blues are all popular choices for farmhouse furniture. If you’re unsure which to choose, why not grab a few sample pots and see what you like best in your space?
Don’t forget, always choose quality over price. I’ve learned the hard way that cheaper tools can lead to a less-than-stellar finish and end up costing more in the long run when they need to be replaced.
Safety Measures to Consider Before Starting
Before diving headfirst into your project, remember to prioritize safety. Working in a well-ventilated area is crucial when painting, and don’t forget your safety glasses and gloves, especially when sanding or working with harsh chemicals. You might be eager to see the transformation, but your health and safety come first.
Step-by-Step Guide to Achieving a Farmhouse Painted Look on Furniture
Now that you’re prepped and ready, let’s dive into the exciting part—the transformation process. Follow this guide and you’ll have a beautiful farmhouse painted piece before you know it.
Cleaning and Prepping Your Furniture
Before we start painting, you need to ensure your furniture piece is clean and free from dust, grime, or any old flaky paint. Start by wiping it down with a damp cloth and mild detergent. For any stubborn areas, a small scrub brush works wonders. Once your furniture piece is clean, allow it to dry completely.
Sanding: The Secret to a Perfect Base
The next step in your farmhouse painting journey is sanding. This not only helps remove any remaining old paint or finish but also creates a smooth surface for your primer and paint to adhere to.
Manual Sanding vs. Electric Sanders
While manual sanding gives you more control and precision, especially in corners and detailed areas, electric sanders can save time and effort when dealing with larger surfaces or particularly rough pieces. I’ve found that having both on hand gives you the flexibility to use what’s best for each part of your project.
Choosing the Right Grit of Sandpaper
Sandpaper comes in various grits, with lower numbers being more coarse and higher numbers more fine. Start with medium-grit sandpaper (around 80-120 grit) for initial sanding, then move to finer grit (180-220 grit) for finishing touches.
Applying Primer: The Backbone of Long-Lasting Paint Job
Primer helps create a bond between the surface and the paint, ensuring your hard work lasts longer. Apply an even layer of primer, allowing it to dry completely before moving onto the paint.
Choosing the Perfect Farmhouse Color Palette
Farmhouse colors tend to be inspired by nature. Think soft, muted hues that create a warm and inviting space.
Top Trending Farmhouse Paint Colors
While classic white is a staple in farmhouse design, you can also consider shades of gray, taupe, or soft pastels for a unique touch. Don’t be afraid to experiment with color, after all, it’s about creating a space you love.
Monochrome vs. Two-Tone Farmhouse Furniture
A monochrome piece, painted all in one color, offers a clean, cohesive look. On the other hand, a two-tone piece, where the frame and panels or the top and bottom are different colors, can add visual interest. A vintage dresser we refinished last summer showcases this beautifully, with a creamy white frame and distressed charcoal drawers.
Painting Techniques for the Farmhouse Look
There’s more than one way to paint a piece of furniture, and the technique you choose can significantly impact the final look.
How to Paint Smooth Surfaces
When painting a smooth surface, use long, even strokes to apply the paint. A foam roller can be particularly helpful here, as it applies paint evenly without brush marks. Remember, it’s better to do multiple light coats than one thick one.
Tips for Achieving a Distressed Paint Finish
Distressing involves strategically sanding off some of the paint after it dries to give your piece a naturally worn, vintage look. When distressing, focus on areas that would naturally wear over time, such as edges and corners. The key here is subtlety—a little goes a long way!
Applying Sealant for Durability and Protection
After your paint has fully dried, it’s time to protect your piece with a sealant. This provides a protective barrier, guarding against scratches, spills, and wear and tear.
Choosing Between Wax and Polyurethane Sealants
Both wax and polyurethane sealants have their pros and cons. Wax gives a soft, matte finish and is easier to apply but requires more frequent upkeep. Polyurethane, on the other hand, provides a durable finish that’s resistant to water and scratches. We used a polyurethane sealant on our farmhouse kitchen table to withstand the daily hustle and bustle.
Application Tips for a Smooth Finish
Applying a sealant should be done with care. Use a high-quality brush or foam applicator, and always apply with the grain. Allow plenty of time for the sealant to cure before using your furniture piece.
The Final Reveal: Showcasing Your Farmhouse Furniture Transformation
Once the sealant is completely dry, your farmhouse furniture transformation is complete! Whether it’s a coffee table, a set of dining chairs, or a vintage dresser, it’s sure to be a statement piece that adds charm and character to your space.
Easy Farmhouse Painting Techniques for Beginners
Even if you’re new to the DIY world, you can achieve a professional farmhouse-painted look with these easy techniques. So let’s get your creativity flowing!
Dry Brushing Technique
Dry brushing involves lightly brushing over your piece with a minimal amount of paint on your brush. This leaves a soft, textured look that’s perfect for farmhouse style. The trick is to dip your brush lightly in the paint, then remove most of it on a scrap piece of paper before brushing it onto your furniture.
The Art of Distressing Furniture
As we touched on earlier, distressing gives your piece an aged, worn look. You can use a piece of sandpaper or a sanding sponge to lightly scuff areas of the piece where natural wear and tear would occur.
Creating a Whitewashed Finish
Whitewashing involves thinning white paint with water and applying it to your piece in thin layers. This allows some of the wood grain to show through, creating a rustic, weathered look.
Achieving a Crackled Paint Look
A crackled paint finish gives the illusion of paint that has aged and cracked over time. You can achieve this look with a special crackle medium available at most craft and home improvement stores. Simply apply the medium over a base coat of paint, allow it to dry, then paint over it with a top coat. As the top coat dries, it will crackle, revealing the base color beneath.
Common Mistakes to Avoid When Painting Furniture for a Farmhouse Look
As charming as the farmhouse style is, achieving that rustic, worn-in finish isn’t always smooth sailing. Here are some common mistakes that DIYers tend to make, and how you can steer clear of them.
Skipping the Prep Work
You might be eager to see the final result, but rushing into the painting process without proper prep work is a recipe for disaster. Always clean, sand, and prime your piece before painting. It may seem tedious, but trust me, this attention to detail ensures a smooth and lasting finish.
Using the Wrong Paint
Not all paints are created equal. Some are better suited for furniture painting than others. Using high-quality, furniture-specific paint can make your painting process easier and your finish more durable.
Overlooking the Importance of Top Coats
A protective top coat isn’t just a ‘nice-to-have’—it’s a must. It provides a barrier against scratches, stains, and everyday wear and tear. For a farmhouse look, you might choose a matte or satin top coat to keep things looking authentic and rustic.
Overdoing the Distressed Look
Remember, when it comes to distressing, less is more. You want your piece to look naturally aged, not artificially battered. Focus on areas that would naturally wear over time, like corners and high-touch areas.
Maintaining Your Farmhouse Furniture: Tips for Longevity
Congratulations, you’ve successfully transformed your furniture into a farmhouse gem! Now, let’s explore how to keep it looking its best for years to come.
Regular Dusting
Keep your furniture clean by dusting it regularly with a microfiber cloth. This prevents dust and dirt from building up and scratching the surface.
Avoid Harsh Cleaners
Harsh cleaners can strip the paint and finish off your furniture. Instead, use a mild soap and water solution for cleaning.
Regular Waxing or Polishing
If you’ve used a wax sealant, regular waxing helps keep your piece looking fresh and well-maintained. For polyurethane-sealed pieces, occasional polishing can help maintain their sheen.
Protect from Extreme Conditions
Try to keep your farmhouse furniture out of direct sunlight and away from heat sources, as extreme conditions can cause the wood to warp and the paint to fade or crack.
The Impact of Farmhouse Furniture on Home Design
With its vintage charm and cozy appeal, farmhouse furniture makes a lasting impression on home design. Let’s see how:
Enhances the Rustic Appeal
Farmhouse furniture, with its distressed finishes and earthy tones, complements the rustic aesthetic of a home. Whether it’s a distressed coffee table in the living room or a painted farmhouse-style dresser in the bedroom, these pieces add a touch of warmth and personality to your space.
Provides Timeless Charm
One of the great things about farmhouse design is its timeless appeal. Even as trends come and go, farmhouse style remains a classic choice, ensuring your home always feels inviting and in style.
Brings Comfort and Functionality
Farmhouse furniture prioritizes comfort and functionality as much as style, making it a practical choice for everyday living. The blend of beauty and utility makes farmhouse furniture a beloved choice for homeowners.
Embrace the Farmhouse Charm
And there you have it—a comprehensive guide to achieving a farmhouse-painted look on your furniture. Whether you’re a DIY novice or a seasoned pro, this transformation process is sure to be an exciting journey.
Remember, farmhouse style isn’t just about following a trend—it’s about creating a home that’s warm, welcoming, and uniquely you. So go ahead, pick up that brush, and let the magic of farmhouse charm unfold. Enjoy the process and, most importantly, have fun with it!

Charlie Victor
Charlie Victor is a go-to source for home decor, home improvement, DIY projects, and backyard makeovers. Based in Florida, he has been transforming homes and businesses across the state since 2005. When he isn’t working, you can find him surfing out on Miami waves!


